
Dryer Vent In Basement Window
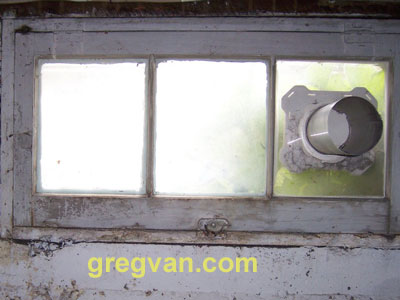
The old dryer vent in the basement
window. This is usually the easiest way to install a dryer vent in your
basement. Make sure that the window is a casement or crank out window
before installing a dryer vent in it.
If the window slides in any direction, you could have problems opening
the window with a dryer vent installed in it. In other words do not
install a dryer vent in a sliding window, double hung or single home
window or any other window that opens from left to right or up and down.
I think you're getting the picture.
One Very Important Thing to Remember Here, This
Does Not Meet Your Local Building Codes and You Should Check with Your
Local Building Department before Proceeding.
How Do I Install a Dryer Vent in a Casement Window like This?
The first thing you will need to do is remove the glass pane. In the
picture above there are three glass panes and you can remove any one of
them to install your new dryer vent. Remove the window glazing from the
perimeter of the glass pane. Then remove the glass carefully. If the
glass breaks, that won't be a big deal, because you're going to be
replacing it with Plexiglas.
Measure the window opening or take the unbroken piece of glass down to
your local hardware or home improvement center to purchase a piece of
Plexiglas, the same size as the piece of glass you will be replacing.
Most dryer vents are 4 inches in diameter but double check this
measurement because you will be cutting a round hole in your new
Plexiglas to install the new dryer vent.
After you've cut your new dryer vent hole in the Plexiglas, simply
reinstall this into the casement window, install the proper window tabs
and re-caulk or glaze the window.
Keep an eye on this area to make sure that water isn't leaking through
your new dryer vent in the window. If you notice water or moisture
accumulating around the window sill or window, try to find where it's
leaking from and repair it as soon as possible.