
2 x 4 Beam Replacement Supports

Here's a better look at the 2 x 4 laying on top of the
soil, to minimize or prevent any movement of the vertical 2 x 4 beam
replacement support system that was built to replace the damaged roof
support beam.
Don't just lay the 2 x 4 on top of the soil, if you look closely, you
can see that I removed as much debris as I could. This will provide me
with the flattest surface possible and an excellent support for my
temporary roof rafter shoring.
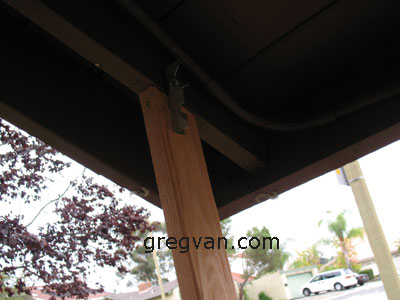
To secure the 2 x 4 safely to the bottom of the roof
rafter, I used a metal teco clip with a couple of screws. In a situation
like this, it's always going to be better to use screws instead of
nails. Screws are a lot easier to remove and reuse.
The top and bottom of your support systems must be securely connected to
the items that they're supporting, to prevent them from disconnecting
while you're replacing the roof beam.